Initial Setup: Hosting And Domain Name
You can get started for less than it costs to eat out these days! The Websavers Helium hosting plan starts as low as... FREE! It's just the domain name registration you'll be paying for.
Optionally increase your Support Level to Managed Troubleshooting and instead of replying with guides for you to follow, we'll actually step in to help troubleshoot any issues you encounter with your hosting, DNS, and website!
Click below to see our hosting plans and choose the one that best fits your goals and budget. Once you've started the order, you can always switch back to this window or tab for guidance with the order process.
Step 1: Choose an available domain name
If you're going with Carbon or Titanium hosting: You'll be skipping this first step (domain selection), then further down this guide we'll show you how to add a domain registration to your order.
If you're going with Helium: and you already have a domain name registered, pick "Transfer your domain from another registrar". If you don't already have a domain registration, you're all set to register a new one! Enter your preferred domain to get started.

You'll be presented with different TLD options to select from, like .com, .net, .me, .ca, etc. You can add as many of these TLDs as you would like to your order, but just one is all that's necessary.
Tip: If you select the Titanium hosting plan on a 1, 2 or 3 year cycle, the domain will be free!

Step 2: Configure & Select Addons
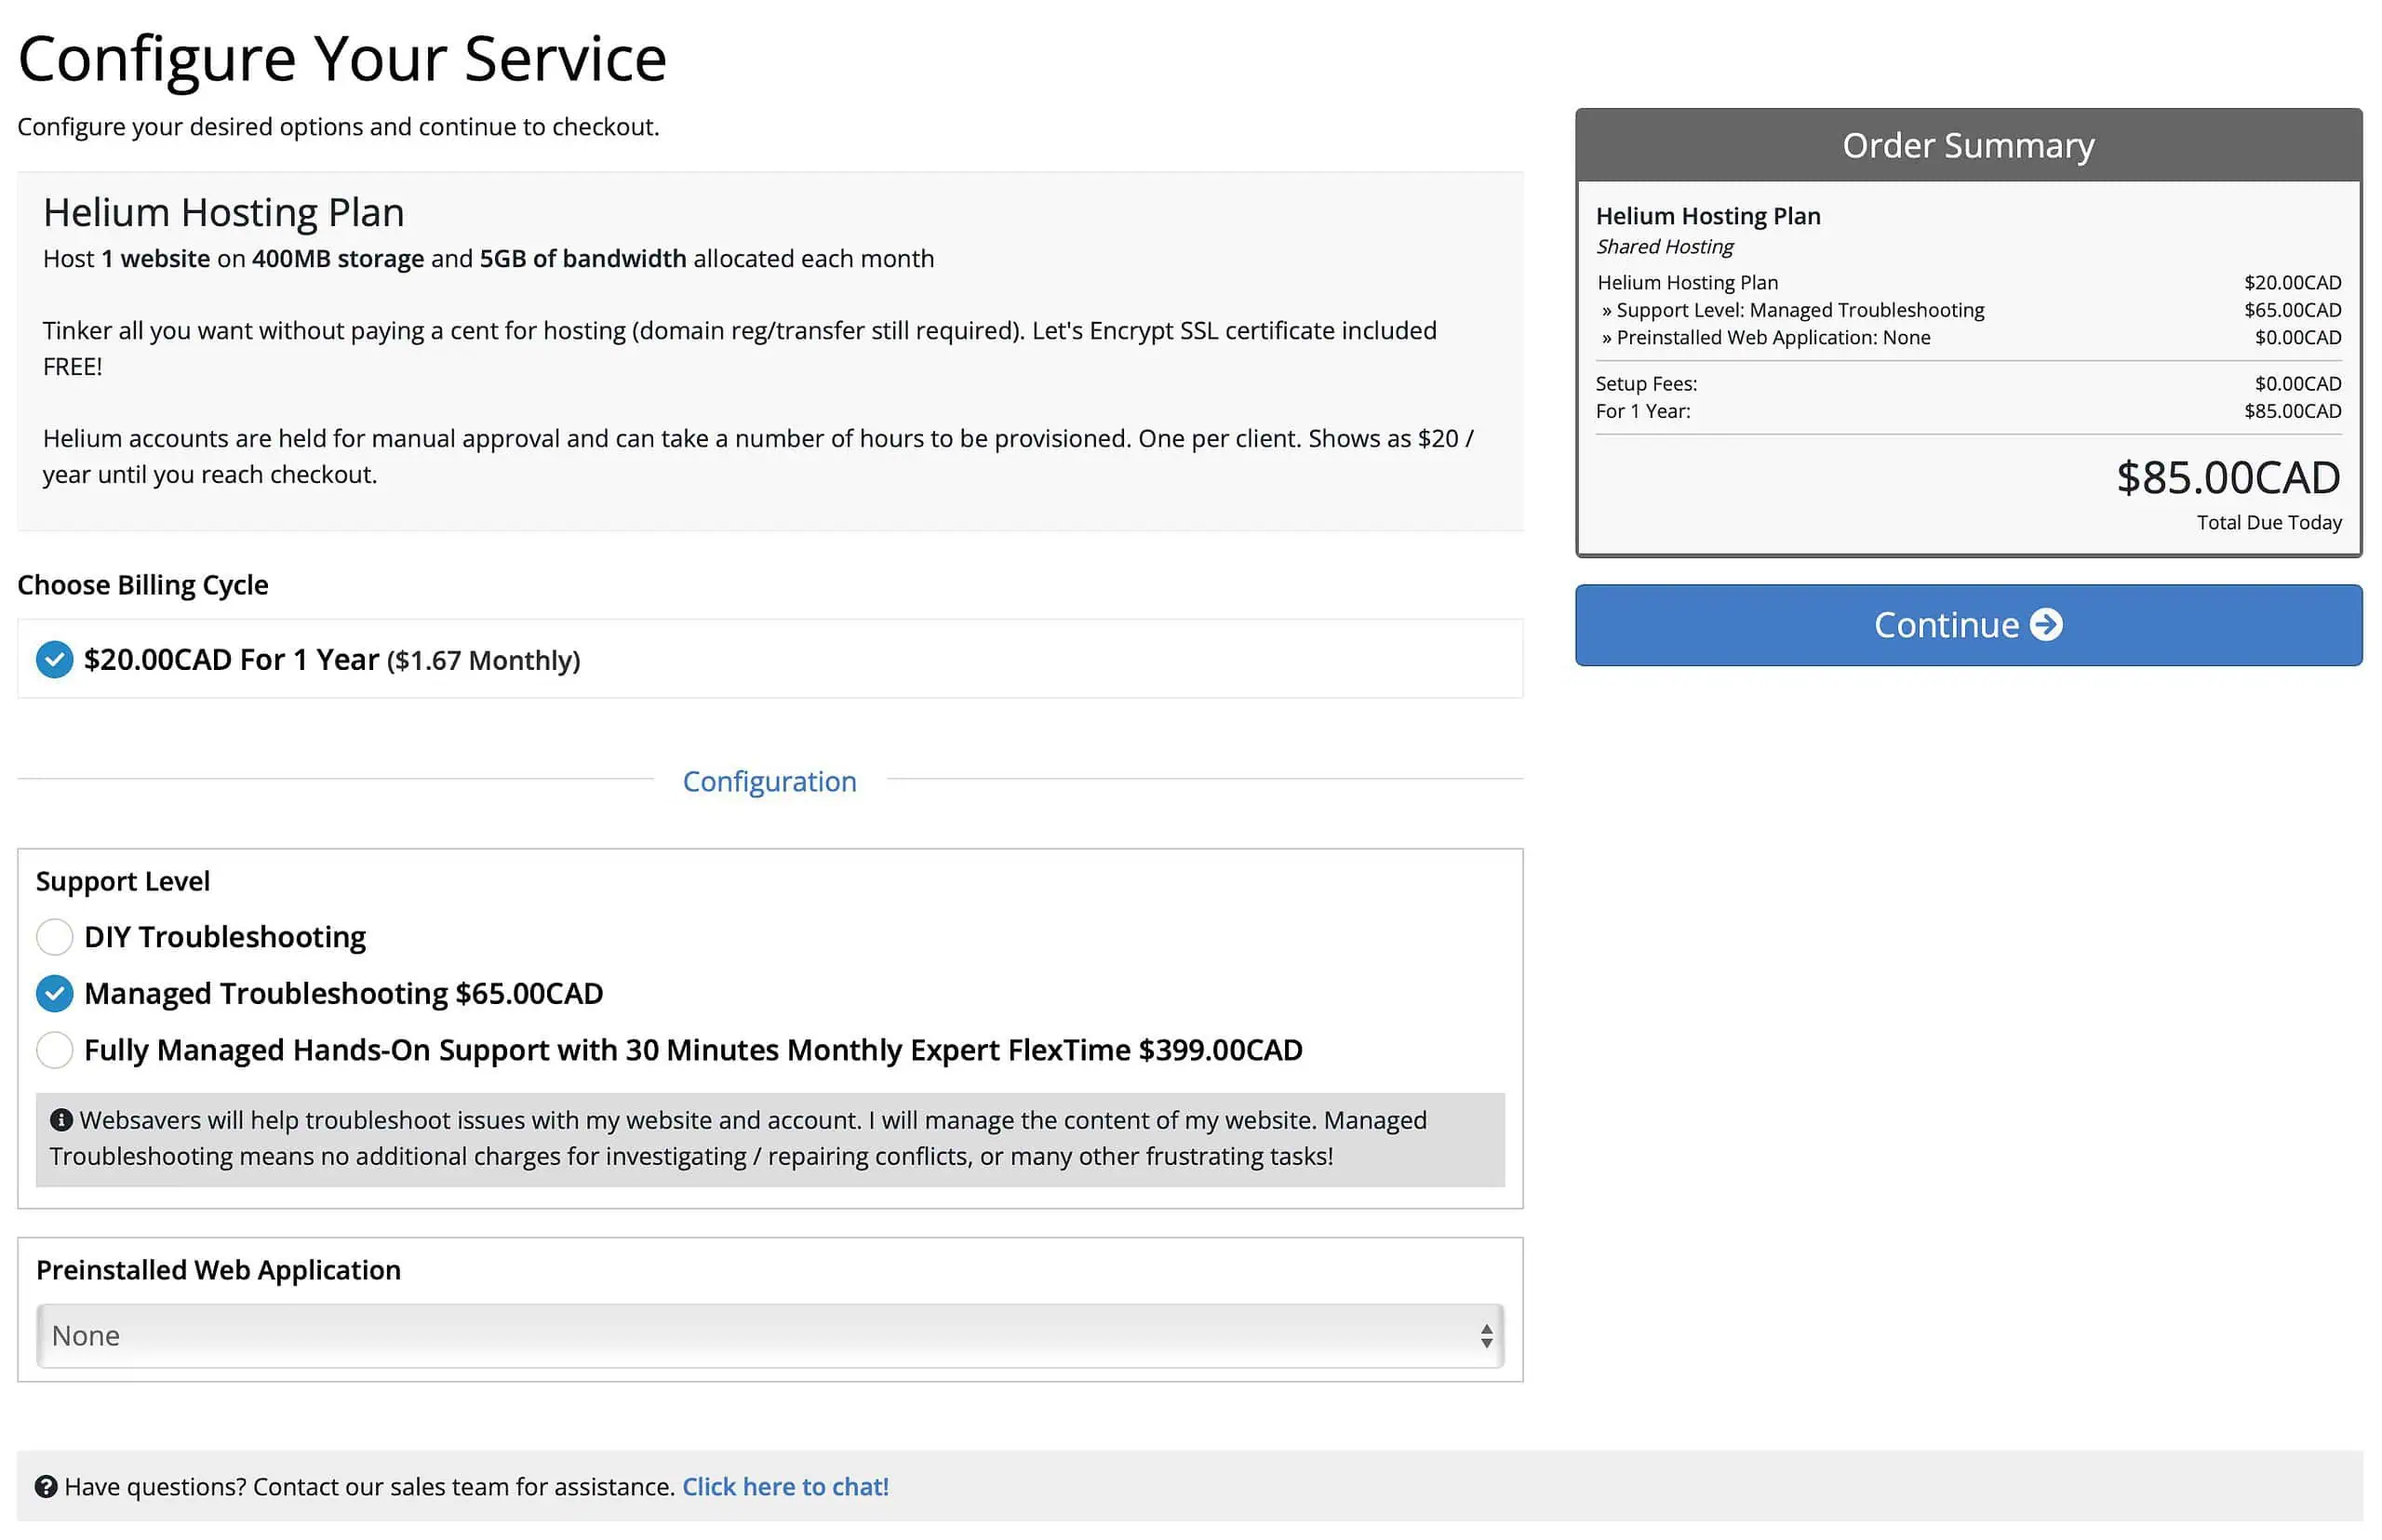
Billing Cycle: For Carbon or Titanium plans you can select from a few options here - the longer you prepay for the greater the overall savings!
Tip: Helium will not yet show the $20 discount that makes it free - you'll see that when you reach the Cart / Order Review page.
Preinstalled Web Application: When configuring the hosting plan, you have the option to "Preinstall WordPress". This will save you a ton of time: by choosing this option, once your order is completed, WordPress will be automatically installed for you, allowing you to skip most of the installation process in step 2! I highly recommend it.
Support Level: If you love figuring things out yourself, then stick with the DIY Support Level because we'll still be standing by to help answer your questions - we just won't step in to help make any adjustments to the account for you. If you'd prefer to have us step in and take care of issues for you when they arise, I'd recommend choosing the Managed Troubleshooting Support Level - it helps to avoid potential frustration as you're getting started, but if you're the patient trial-and-error kind of personality, then you don't need it!
Websavers SiteMaker: Since you're creating your own WordPress website, you can leave the "SiteMaker Professional Website Set-up" option unchecked. BUT if you'd prefer to let us take care of the entire rest of this guide for you, SiteMaker is exactly what you need!

Speed and Security Optimization (Carbon,Titanium Only): This is most often used for those transferring sites to us, so you can keep it unchecked for now. It might be worth considering in the future as your site gets larger and more popular.
Step 3: Configure Your Domain
Tip: if you selected the Carbon or Titanium plan you won't see this option, so you can skip directly to step 4, then come back here if you need guidance after adding a domain to the cart.
EPP Code: this will only be visible if you're transferring your domain to us from another registrar. You will need to obtain this code from your current registrar before proceeding.
ID protection: this is what will hide your personal information when someone does a public "whois" lookup on your domain name. It's free, so we recommend it for all domains, which is why it's pre-checked. Since many spammers now scan the WHOIS directories for new registrations, enabling it will prevent an influx of spam shortly after you register the name.

Step 4: Verify Your Cart. Add a domain?
This is the total of your cart where you can verify everything is as you anticipated prior to checkout.
Helium Price Reduction: If you ordered the Helium plan, in the Order Summary box you will see the reduction applied that changes its core price to free. This does not apply to the Support Level selection.
Add a Domain? If you selected the Carbon or Titanium hosting plan and you wish to register a new domain to use for your website, choose the Add a Domain button here to also add your domain registration to the cart.
Once you have everything as you like it, click the Checkout button to proceed.

Step 5: Fill In Your Account & Billing Details
You can pay by Credit Card or Paypal. Fill out all the payment information and click on the green "Complete Order" button.
Be sure to save your password! You will need this along with your email address to log in to your Websavers account in the future.
If you don't make use of one, we strongly recommend using a password manager, like LastPass. Then save your Websavers login details in your password manager.

To get to your account, after completing your order, you can click on the button that says "Proceed to the Client Centre" or click here.