How to Use Beaver Builder for WordPress: a Comprehensive Guide

For each page and post within WordPress you get the WordPress Block Editor: a basic page or post layout manager that’s perfect for blog posts, but a bit limited for full-scale web page building. It’s much like working within your favourite word processing application: you can write/insert and format your text, insert images and videos very easily! This is often just fine for blog posts and even many pages.
However in some cases you want to do more than just basic text and images: you might want to set up multiple columns of text or images or you might want to create completely separate full-width rows with colour-banded backgrounds, or parallax effects, or more!
To accomplish this, you need a more advanced page builder. There’s a lot of page builder tools for WordPress, so how do you pick which one to use? We had to answer that very same question a few years ago and, as long-time WordPress developers, we had some pretty high demands which include:
- Powerful: Rapid development is a necessity and perhaps even more-so, compliance with HTML and CSS basics, such as ensuring that global styles are managed separately (ie: via Theme Customizer) from page-specific or section-specific styles.
- Simplicity: Easy to edit content, after all, we want our clients to be able to make edits easily after we’ve built the site
- Appearance: An aesthetically pleasing interface
- SPEED (and cache friendly): Give us all the speed. If your framework is slowing down your site, you’ve got a problem. Since speed is a major consideration for us, we wanted to be sure that we could simply enable a plugin like WP Super Cache or WP Rocket and things would just work faster without interfering with the pages we’ve built and without having to fiddle with settings.
- Stability: The page builder we chose had to be reliable. If it updates and breaks half the sites we built, we do not want to be spending days fixing them.
Speaking of speed, have you seen our WordPress optimized hosting? You’re surely thinking, “not another supposed WordPress optimized host” and perhaps also “I bet they’re going to claim they’re Beaver Builder optimized too”… well… we’re Beaver Builder optimized too! And it’s not just marketing spin. Our web hosting plans are configured with resource limits for every-day Beaver Builder use. And, aside from our powerful performance and security optimizations, we also take daily real-world Beaver Builder feedback into account and tweak our web application firewall to stop getting in your way, allowing you to create to your heart’s content, while remaining secure. Neat huh?
WP Bakery might just be the one that’s been around longest as it’s been bundled with a huge number of ThemeForest themes. But goodness it’s cumbersome with its zillions of shortcodes. I know, a lot of people love it, but I’ve never been able to get any joy from it.
Divi was one we enjoyed for a bit, it’s powerful and pretty, and we still have a license for it, but we still got frustrated with many of its awkward design quirks. It feels like in the process of making things really pretty they forgot that design needs to be functional too, and that made as weary.
When we finally tried Beaver Builder (affiliate link) we knew it was the builder for us. Beaver Builder offers a sleek interface where you can iterate very quickly. From a developer’s perspective it’s not cumbersome or frustrating. It doesn’t bog down the sites it’s used on: we’re still able to get excellent WordPress performance with it, even when using a variety of advanced modules.
Perhaps most important of all, compared to every page builder out there, Beaver Builder was designed to work perfectly within the WordPress ecosystem, which itself was built around the concepts of enforcing global styles wherever possible and extensibilty through hooks and its API.
We found Beaver Builder to be the only option to provide all of the above features in one package. Beaver Builder has very quickly become our favourite tool for WordPress development.
We also recently gave Beaver Builder a coveted spot on our “Recommended Resources” page because not only do we believe in it, we use it for every website we build (even this one).
Well? Ya “sold” yet? Read on to learn how to install and use BeaverBuilder!
How to Install Beaver Builder: in the WordPress admin, choose Plugins > Add new, search for “BeaverBuilder” and install and activate it. This will get you the ‘lite’ version of BeaverBuilder, which is great for basic separated row and multi-column layouts. More advanced functionality is available with the BeaverBuilder paid editions. But we recommend trying out the lite version and seeing if that’s enough for you to work with.
How exactly do you use Beaver Builder? You’re in the right spot. Here’s a walk-through of Beaver Builder.
For the purpose of this example, I used the Beaver Builder Agency version – the one we use in-house – but you’ll find many of the same features and versatility in the free version available on the WordPress.org plugin directory.
How to create a new page in Beaver Builder
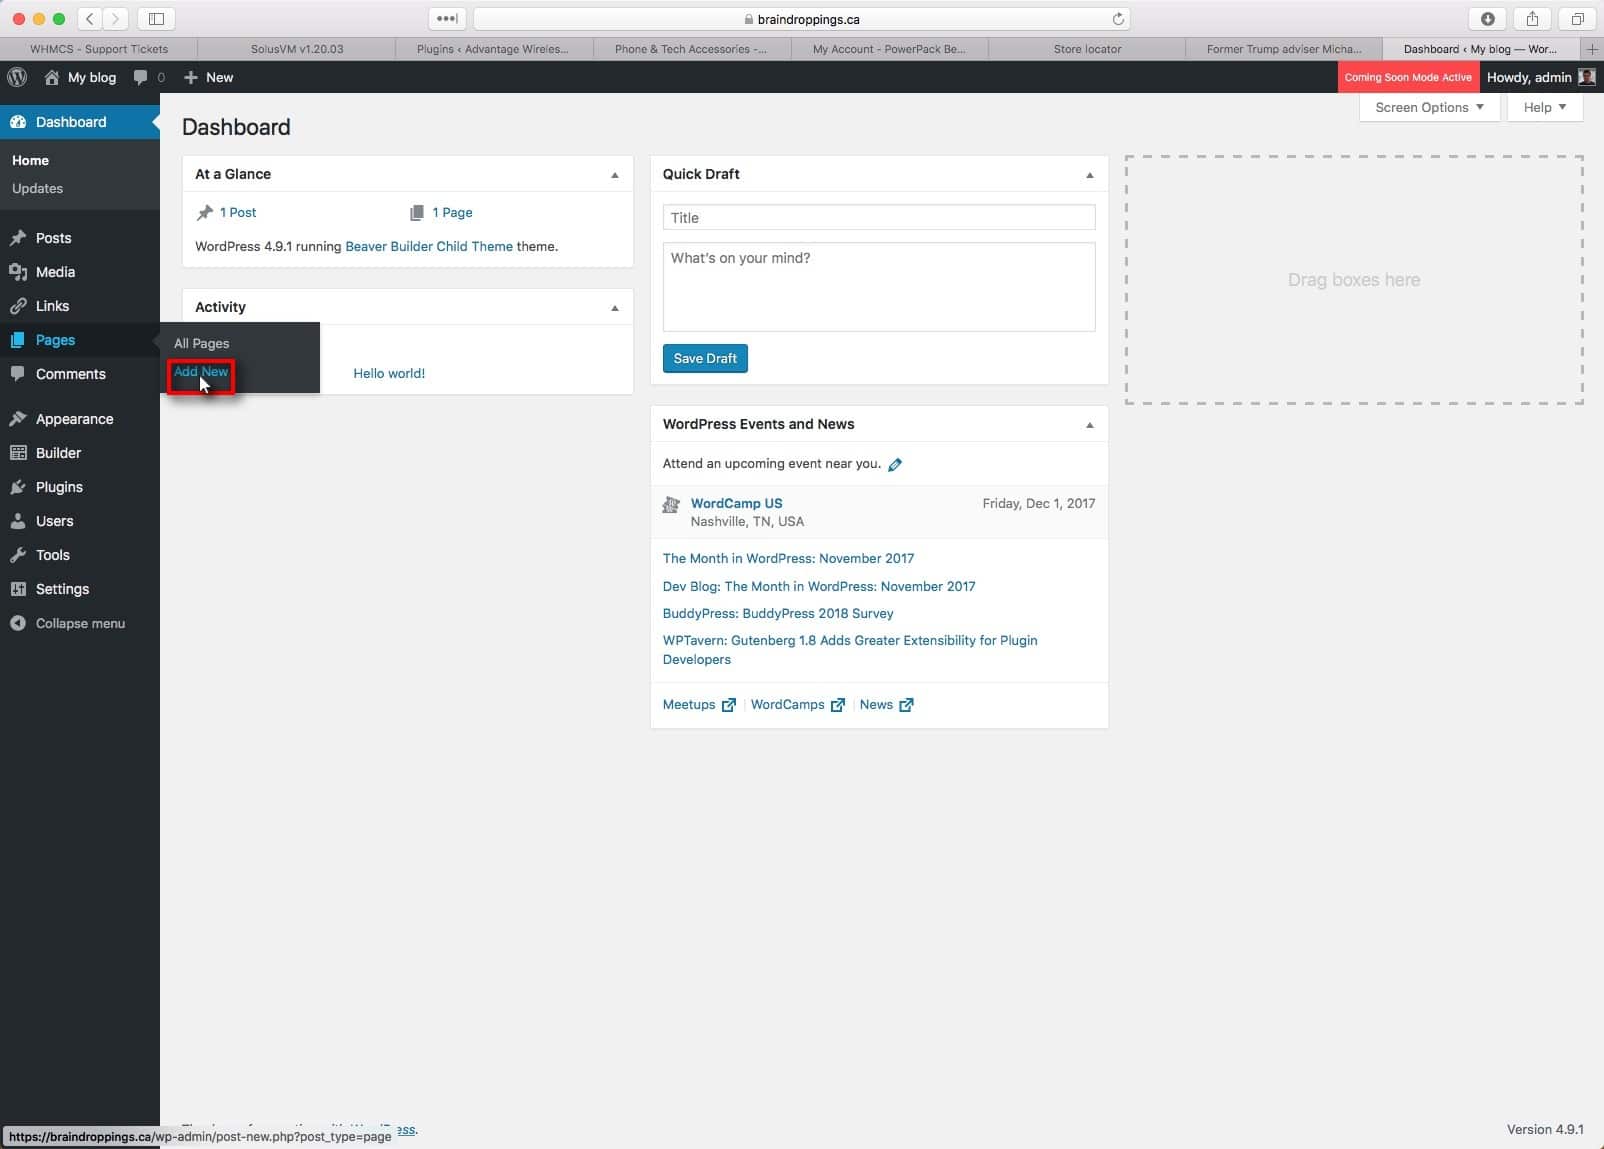

Exploring the Beaver Builder Modules Menu
Here is the beaver builder interface. Clicking the + button in the upper right corner reveals the modules menu. Modules are blocks of various types of content that you can insert into the page. Some are base-level blocks like a simple text editor or single photo, while others are more advanced like entire timelines, or photo galleries.
Under the first tab, appropriately called Modules, you’ll be provided with a list of all the built in modules by default. This list of modules will be larger if you have the Pro or Agency version. You can click the “Group” drop down menu to see other types of modules available. If you have any BeaverBuilder extensions, like Ultimate Addons or PowerPack, you’ll be able to see them in the Groups drop down.


The Beaver Builder stock modules show up under “Standard Modules” and WordPress Widgets (the ones that are traditionally inserted into your website’s sidebars or footer using the WordPress customizer) also appear here. By pulling these into BeaverBuilder, that means you can insert WordPress Widgets anywhere on any page where you’re using BeaverBuilder! If you use a WordPress plugin that provides Widgets, you can use those Widgets within BeaverBuilder.
Tip: If you’re familiar with WordPress shortcodes (a more tech-y version of widgets), you can also use shortcodes within BeaverBuilder simply by adding a Text module to the page and inserting the shortcode as text.
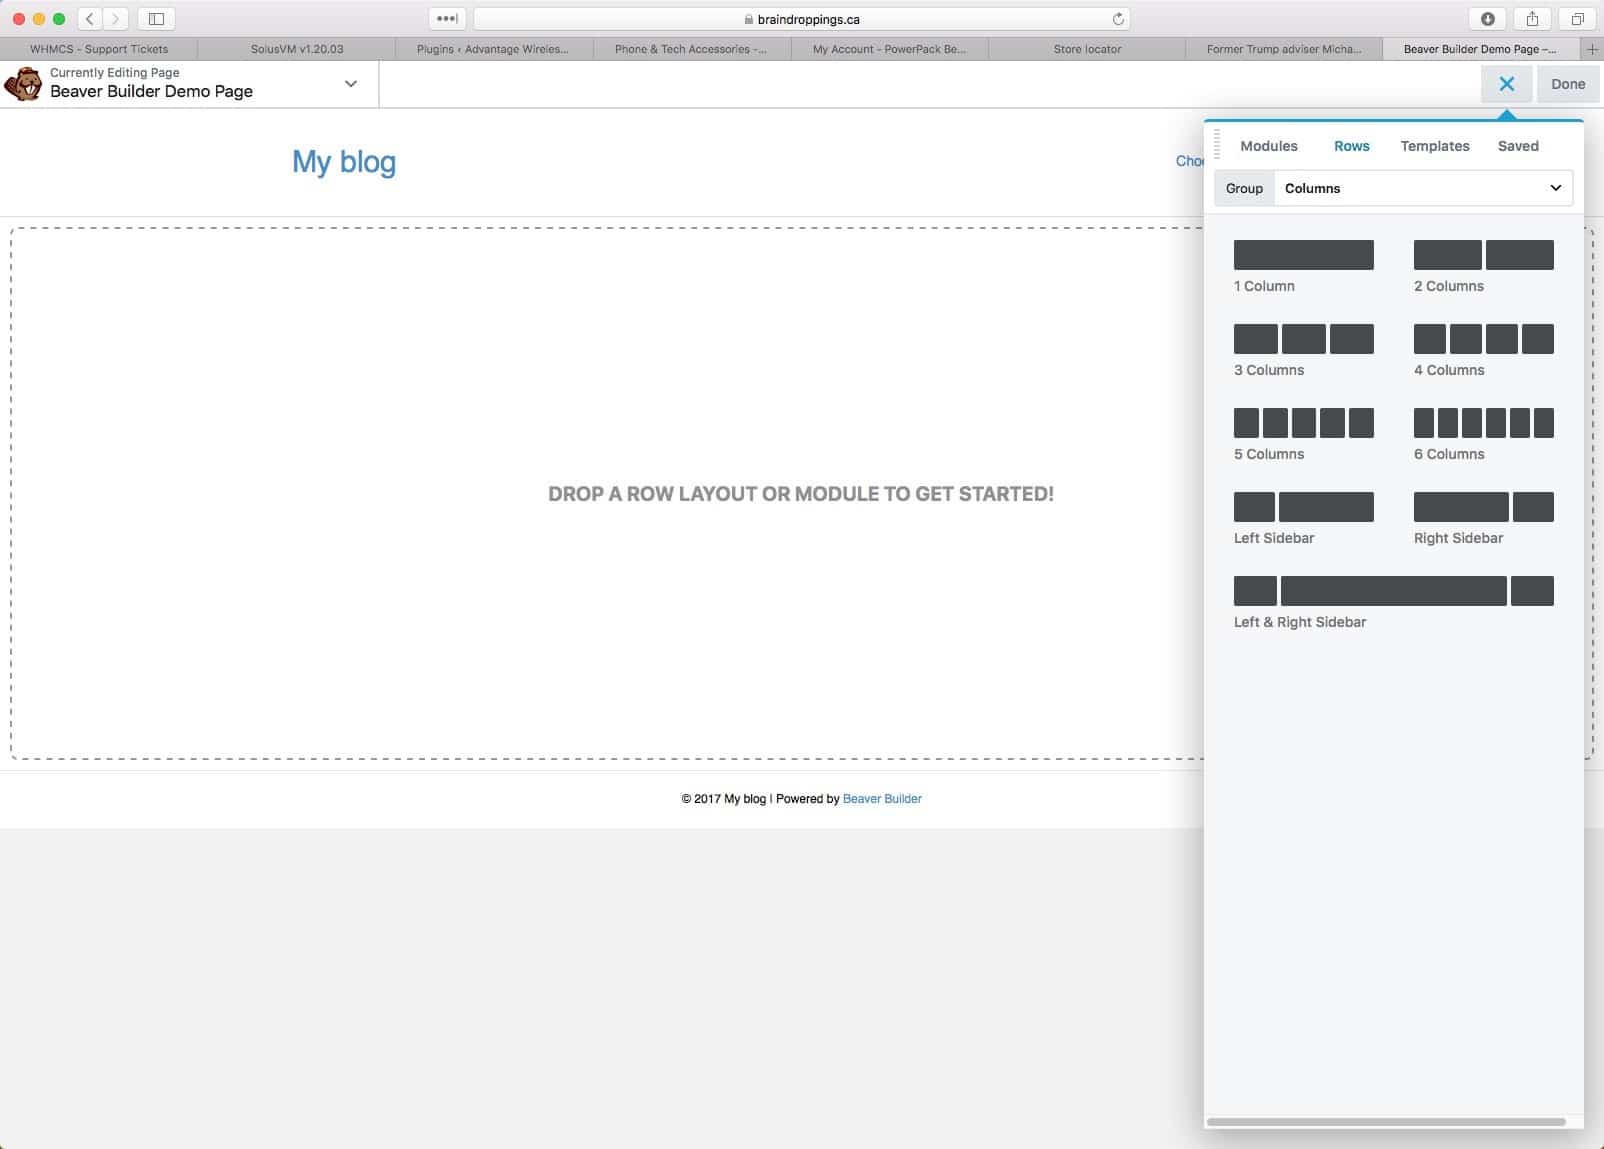
Rows and Column Layouts
Here you can select the column layout you wish to use for your row. Just click and drag a layout you want to use to the spot you’d like to place it on the site.
Templates = Design Ideas and Saved Time!

The Templates section has a bunch of pre-made landing pages (and some content pages) you can pick from. These are all layouts that can be created within Beaver Builder. They’re great for getting design ideas or for getting a head start on a similarly-designed site. More details on how to use this below.
Saved Modules and Rows
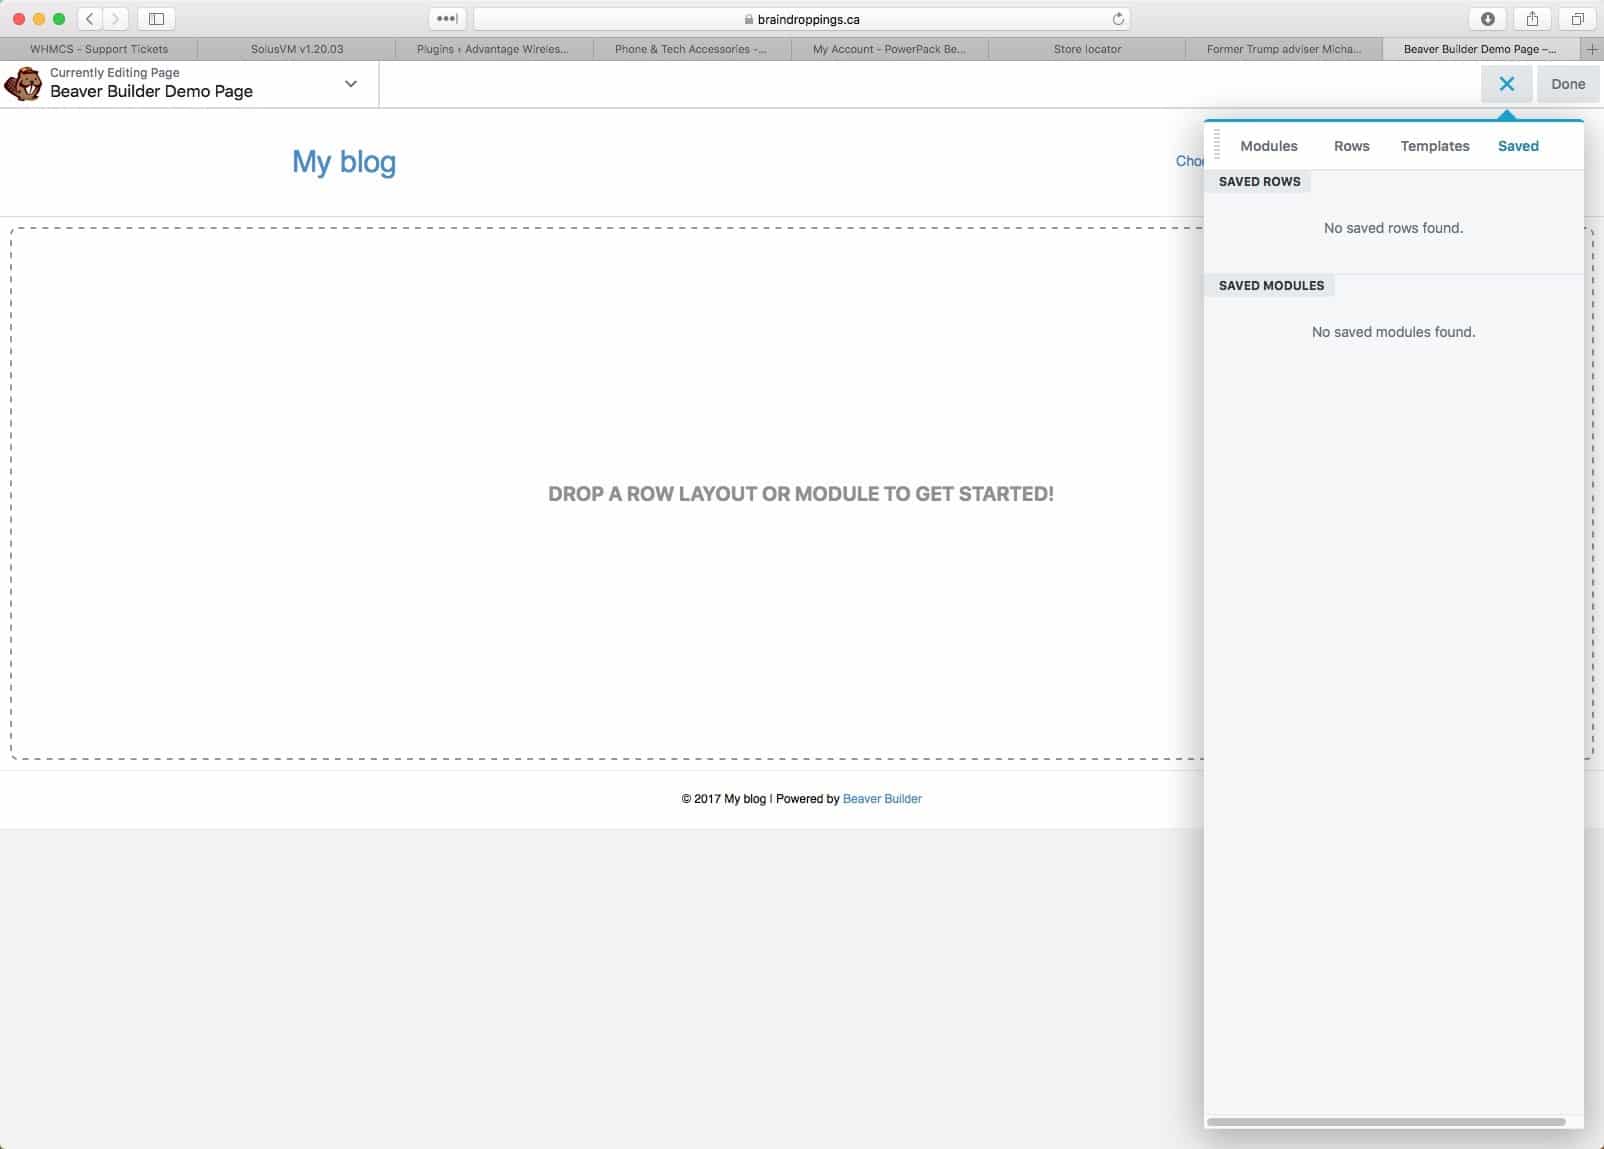
If, during your building, you click “Save As” for any Row or Module, you’ll be able to refer back to those modules and rows – complete with content – in the “Saved” section. This can be great for repeating similar content. You can also use “Global” modules and rows for content you want to update simultaneously across the site.
Adding & Managing Content with Beaver Builder

Click and drag a module onto the page to add it. In this example I dragged a “Header” module into the page and inserted some text in the field called “Heading” that will make up our title.
Next we’ll look at styling the module.
Managing Content Styles in Beaver Builder


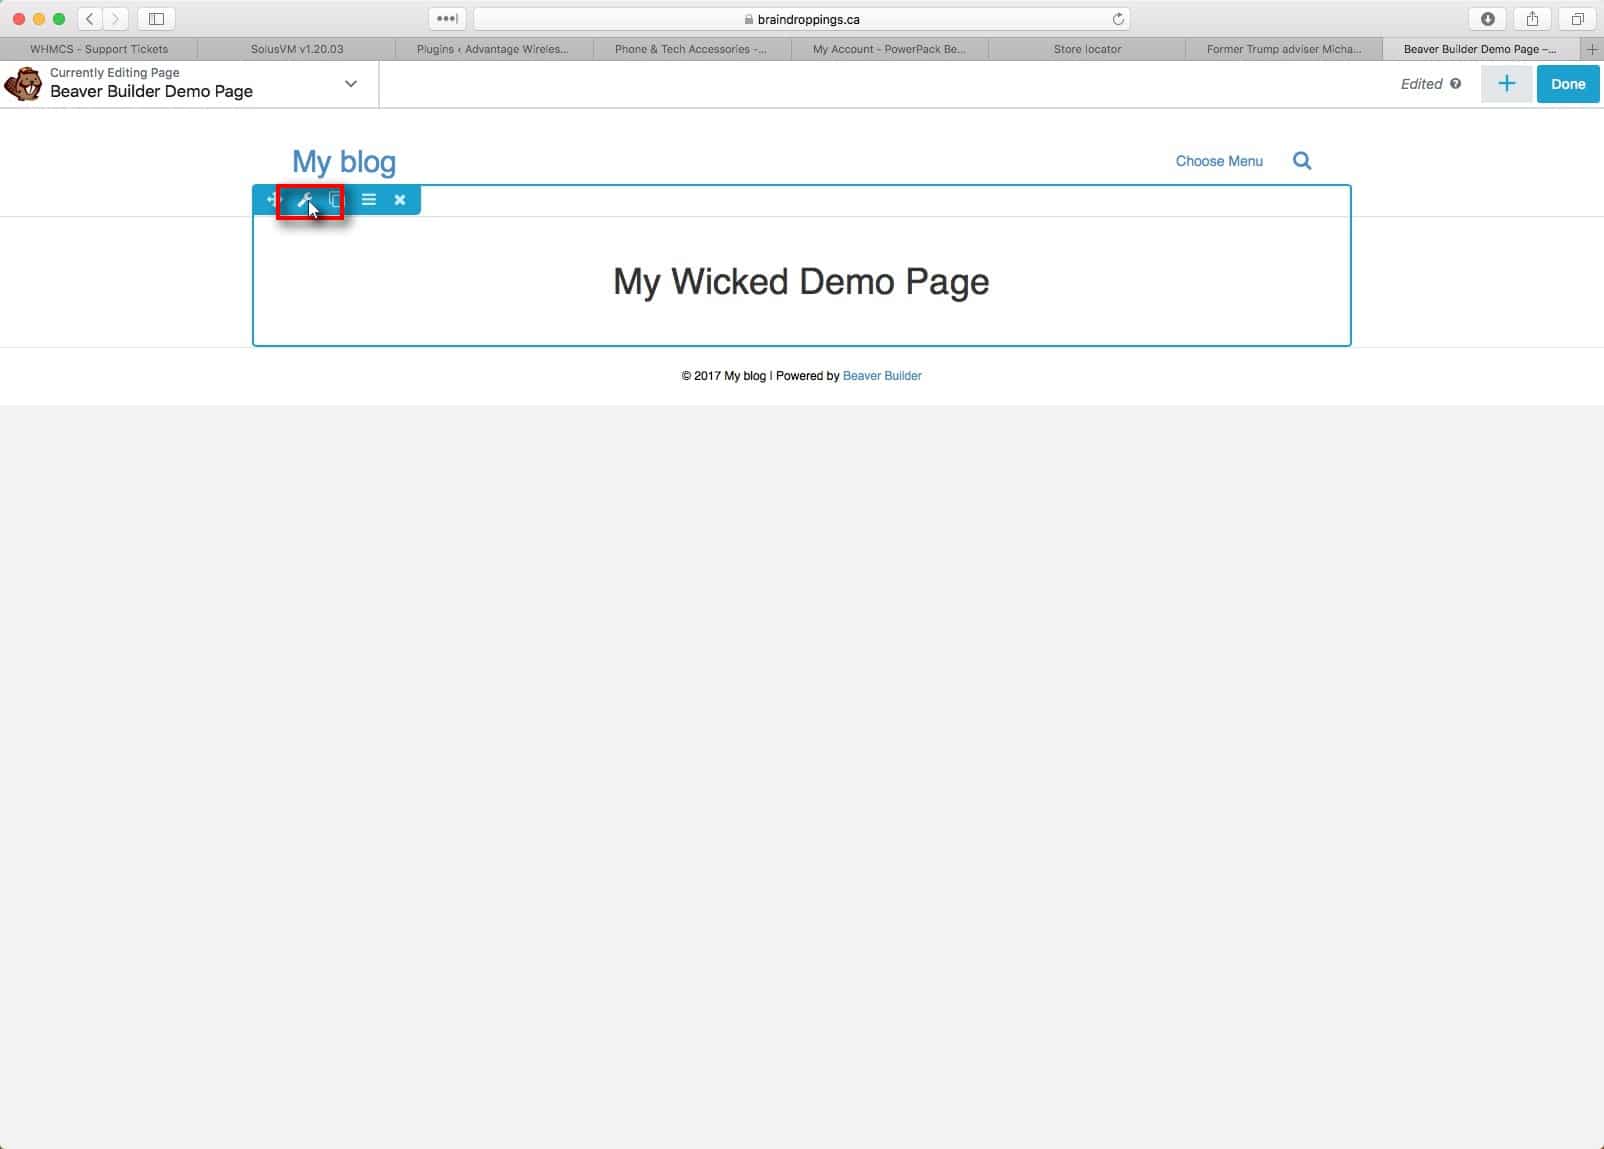
Row Settings in Beaver Builder
By hovering over a row you’ll display the row settings controls. Click on the wrench to open the row’s settings dialogue.
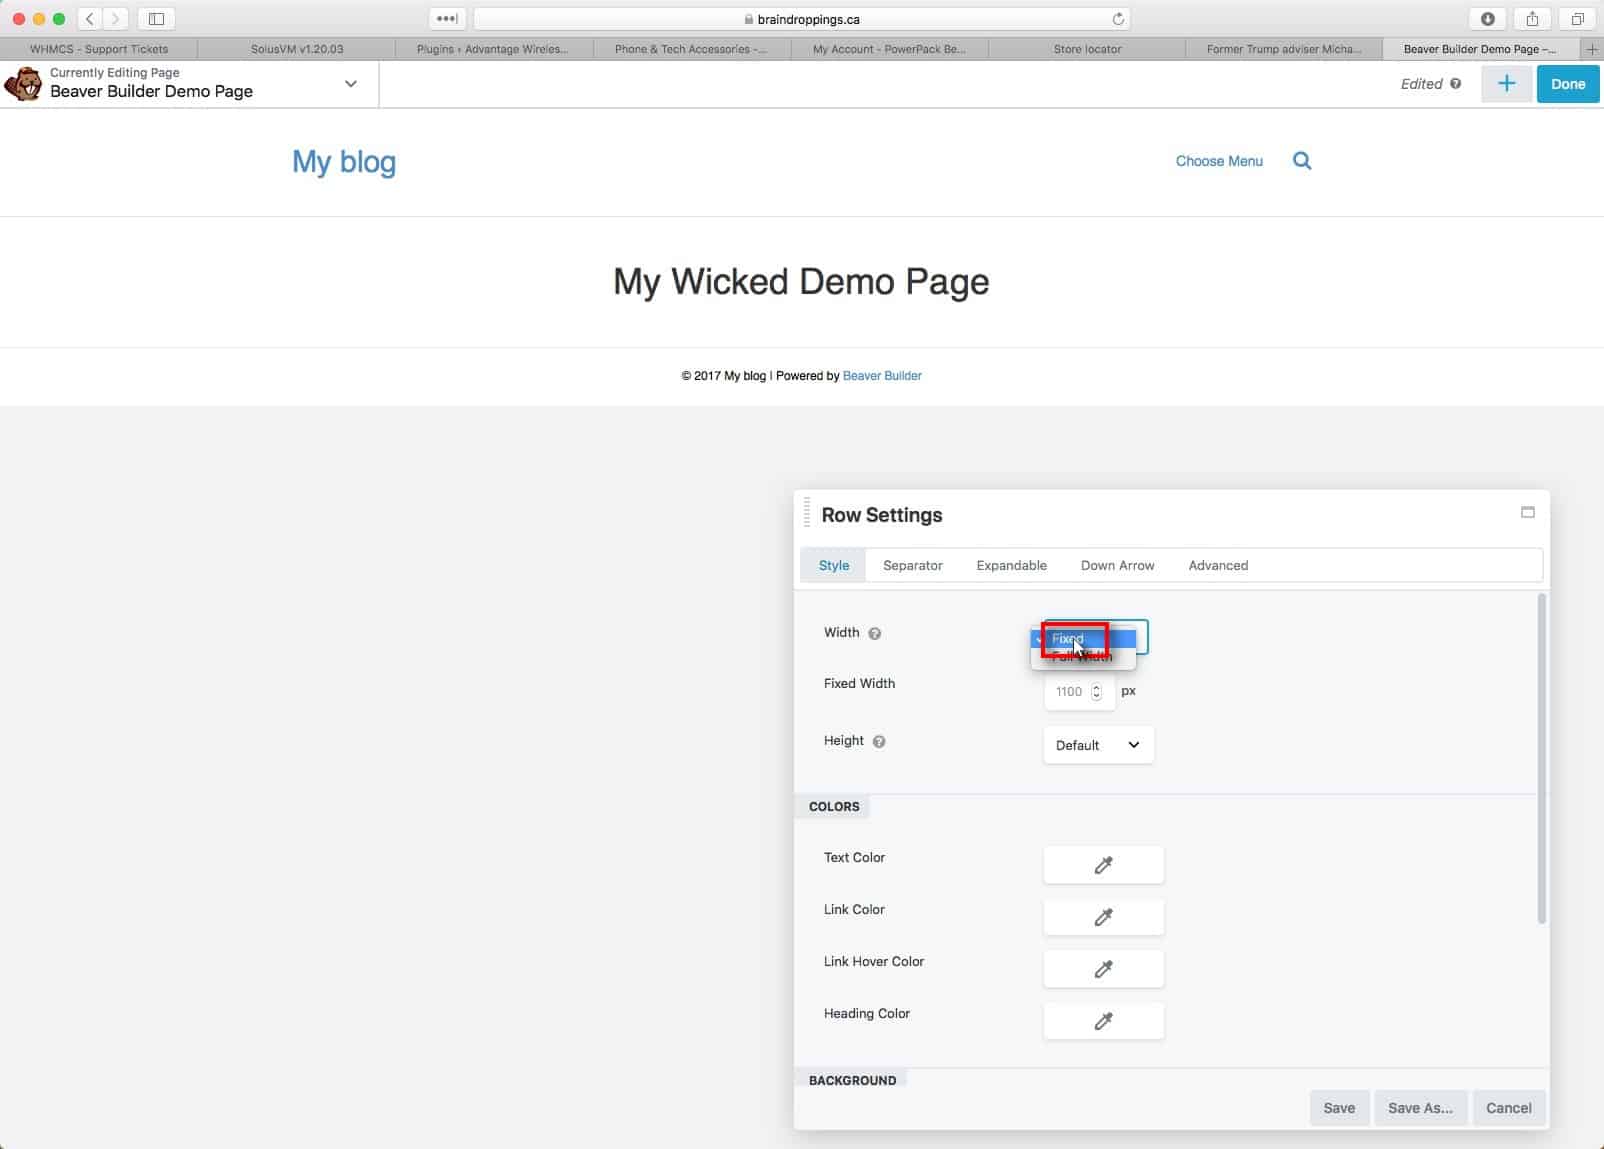
Using Full Width Rows in Beaver Builder
In this case, as with many headers, we want to make the row full width. Beaver Builder gives you the option to make the row itself full width while leaving the content at a fixed width. This is fantastic for things like full-width backgrounds.

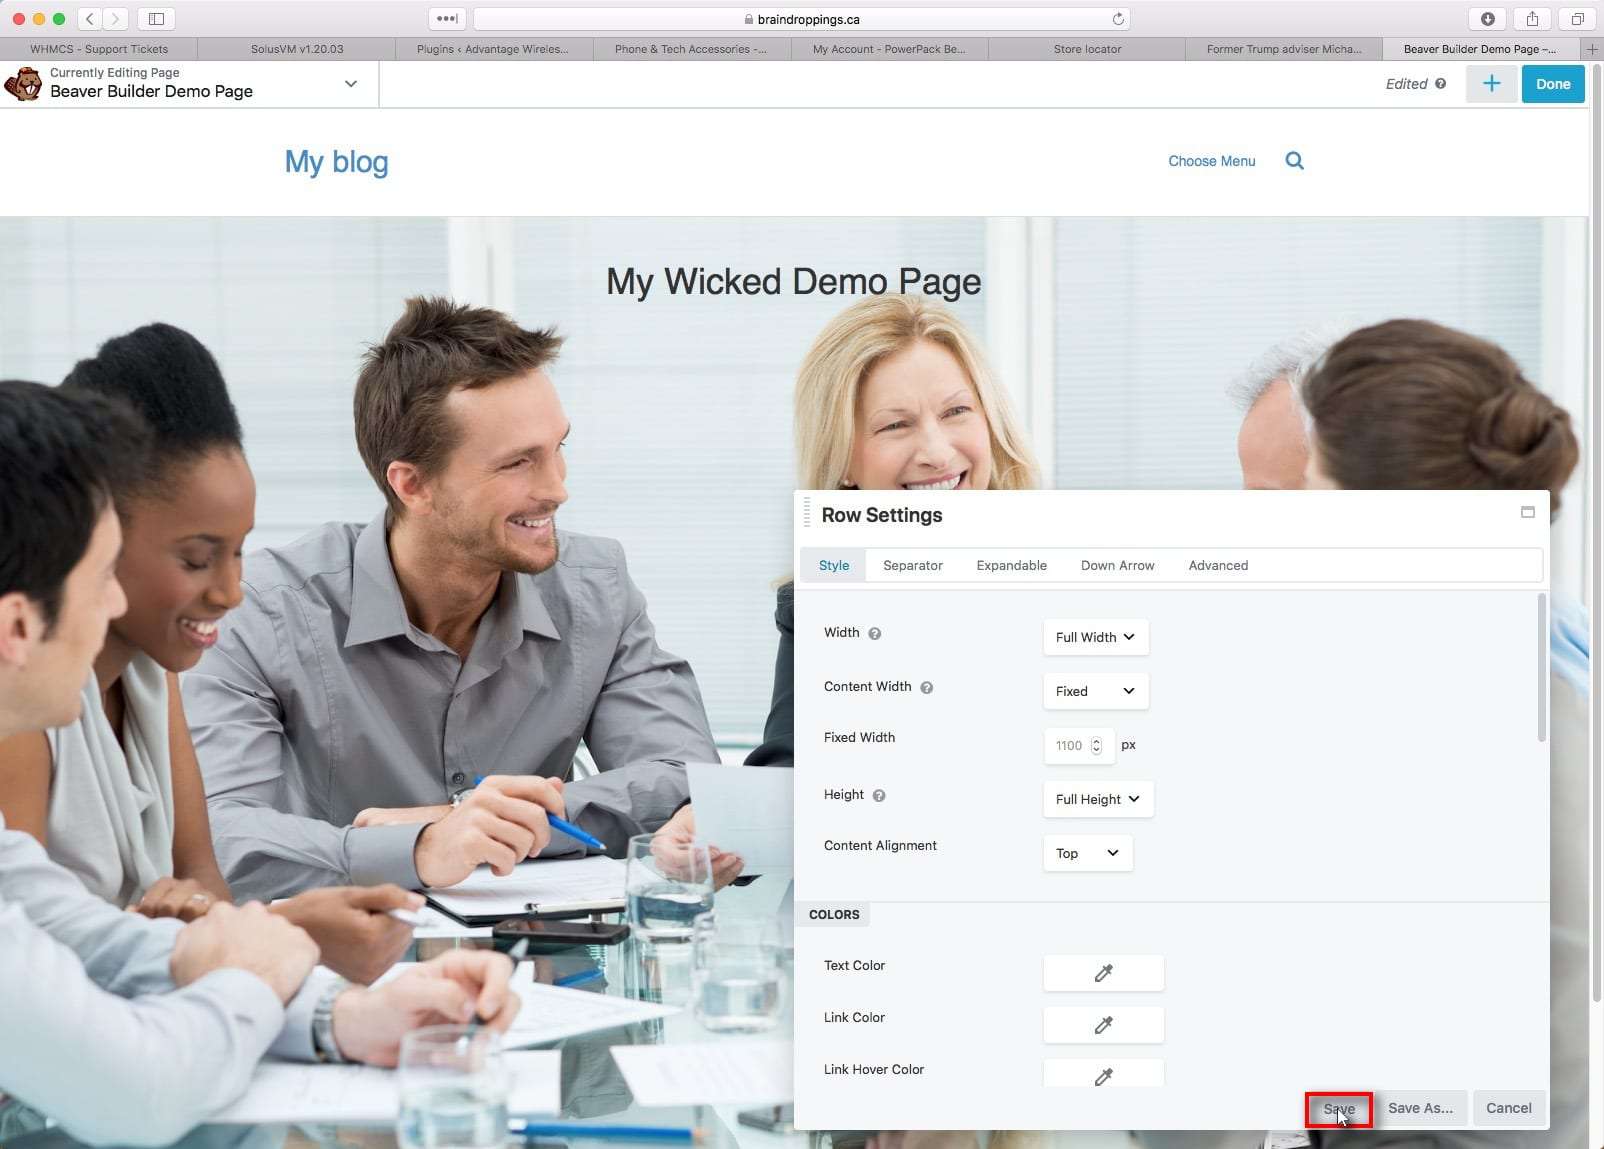
Aligning Row Content Top, Centre, Bottom
When you’ve got a full-height row, you can select the content alignment.
If you’re not using a full-height row, this is done by adding padding above or below the content area.

How to make a row as tall as the screen
Want a full-height hero section? There’s an option right in the Beaver Builder row style settings to do just that! Under “Height”, select “Full Height”.
How to Set a Row Background with Beaver Builder
Scroll down within the Row Settings to find the background config for the Row. We’re going to change this one to a photo background by selecting “Photo” in the Background drop down menu.


Click Select Photo, then when the media library appears, highlight the photo that you wish to insert onto the page. If your photo is not yet in the media library, you can drag and drop them from your computer into the media library to upload them. Once you have your photo selected, click the blue “Select Photo” button in the lower right corner.
Click on the “Save” button to save the changes. Notice how the changes are showing live behind the editing window.
Tip: If you click “Save As” rather than the Save button, the row will be saved in the “Saved” tab of the modules menu. This way you can use that row as a template and insert it on any page, anywhere, on the site. If, after clicking “Save As” you check the box to make it Global, it’s not just a template, but rather will appear identical on all pages you add it to. Changes made to a global saved module on one page will be automatically reflected everywhere it’s used (after clearing any cache plugins).
Deleting a row in Beaver Builder


Hover over the row and click the X in the controls to delete a row (the same is true for any module, or column), then confirm deletion when prompted.
How to Use Page Templates in BeaverBuilder
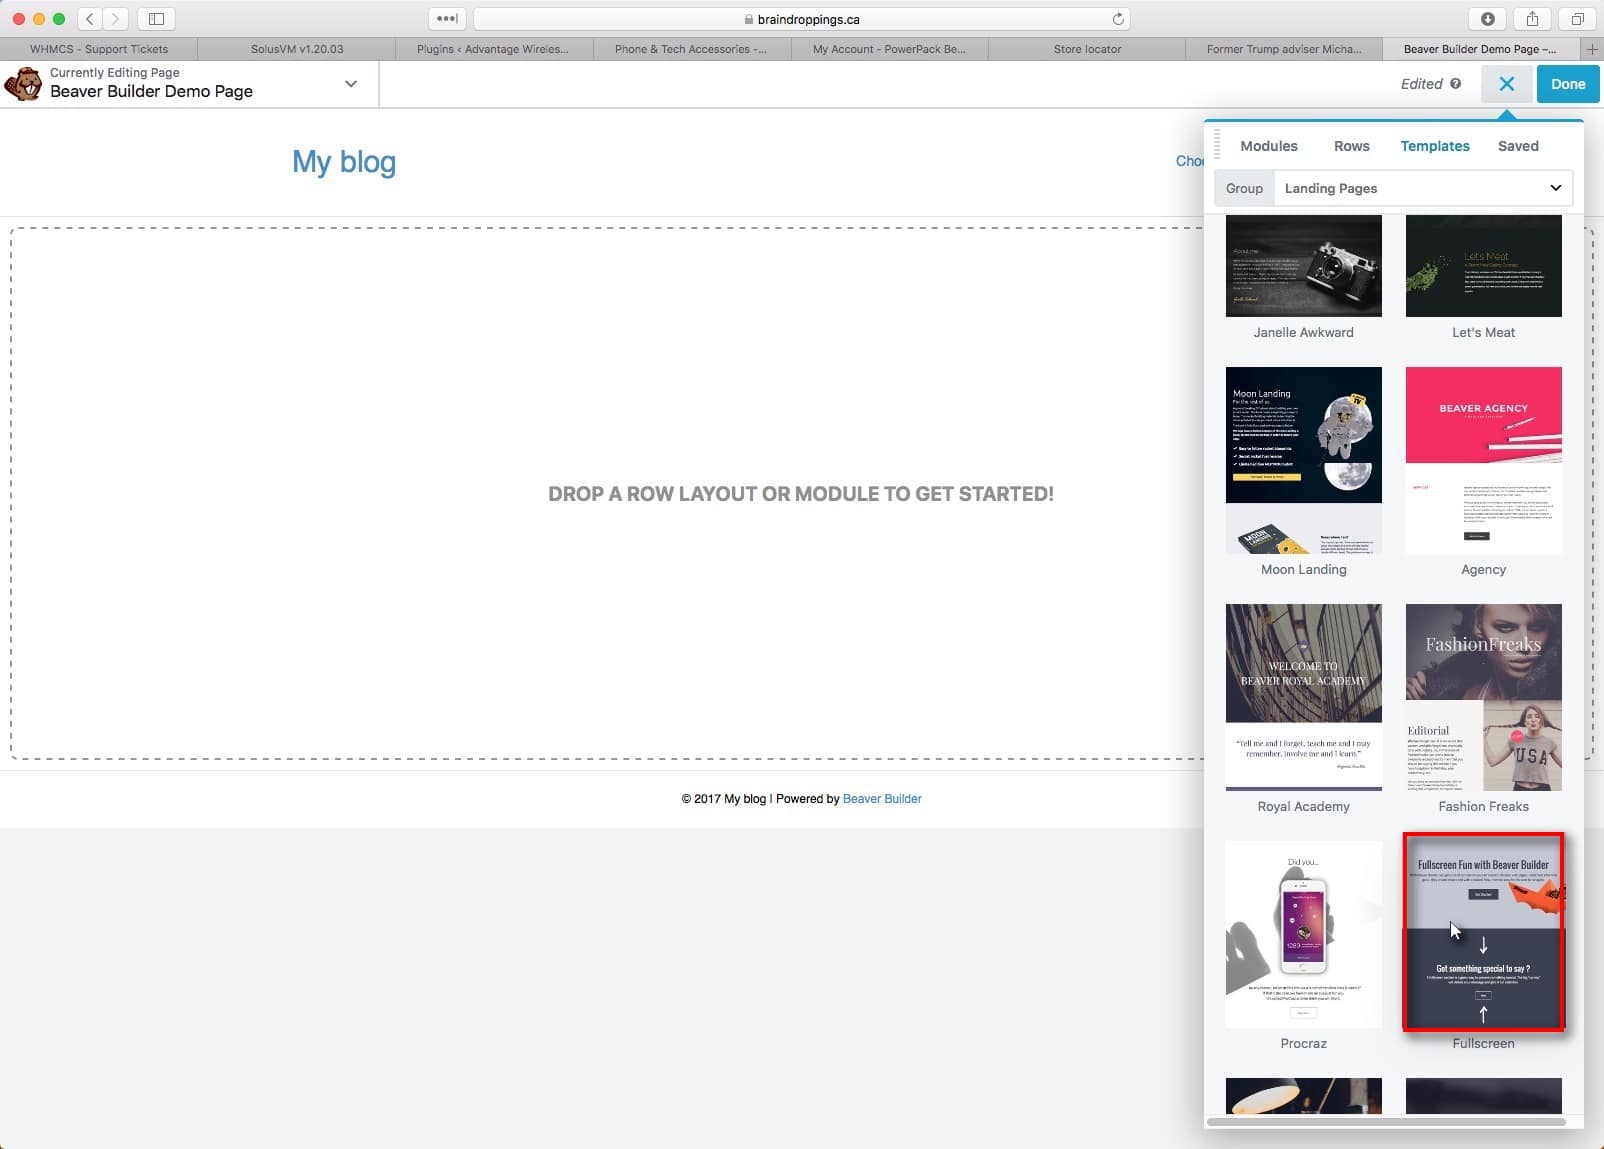
First, open up the Beaver Builder Modules menu by clicking the + button in the top right. Then choose the Templates Tab.
Here you can scroll through the template images to find one that suits your fancy.
Once you click on the template it will be loaded on the live preview directly under the modules menu.
Editing or Changing Content in BeaverBuilder
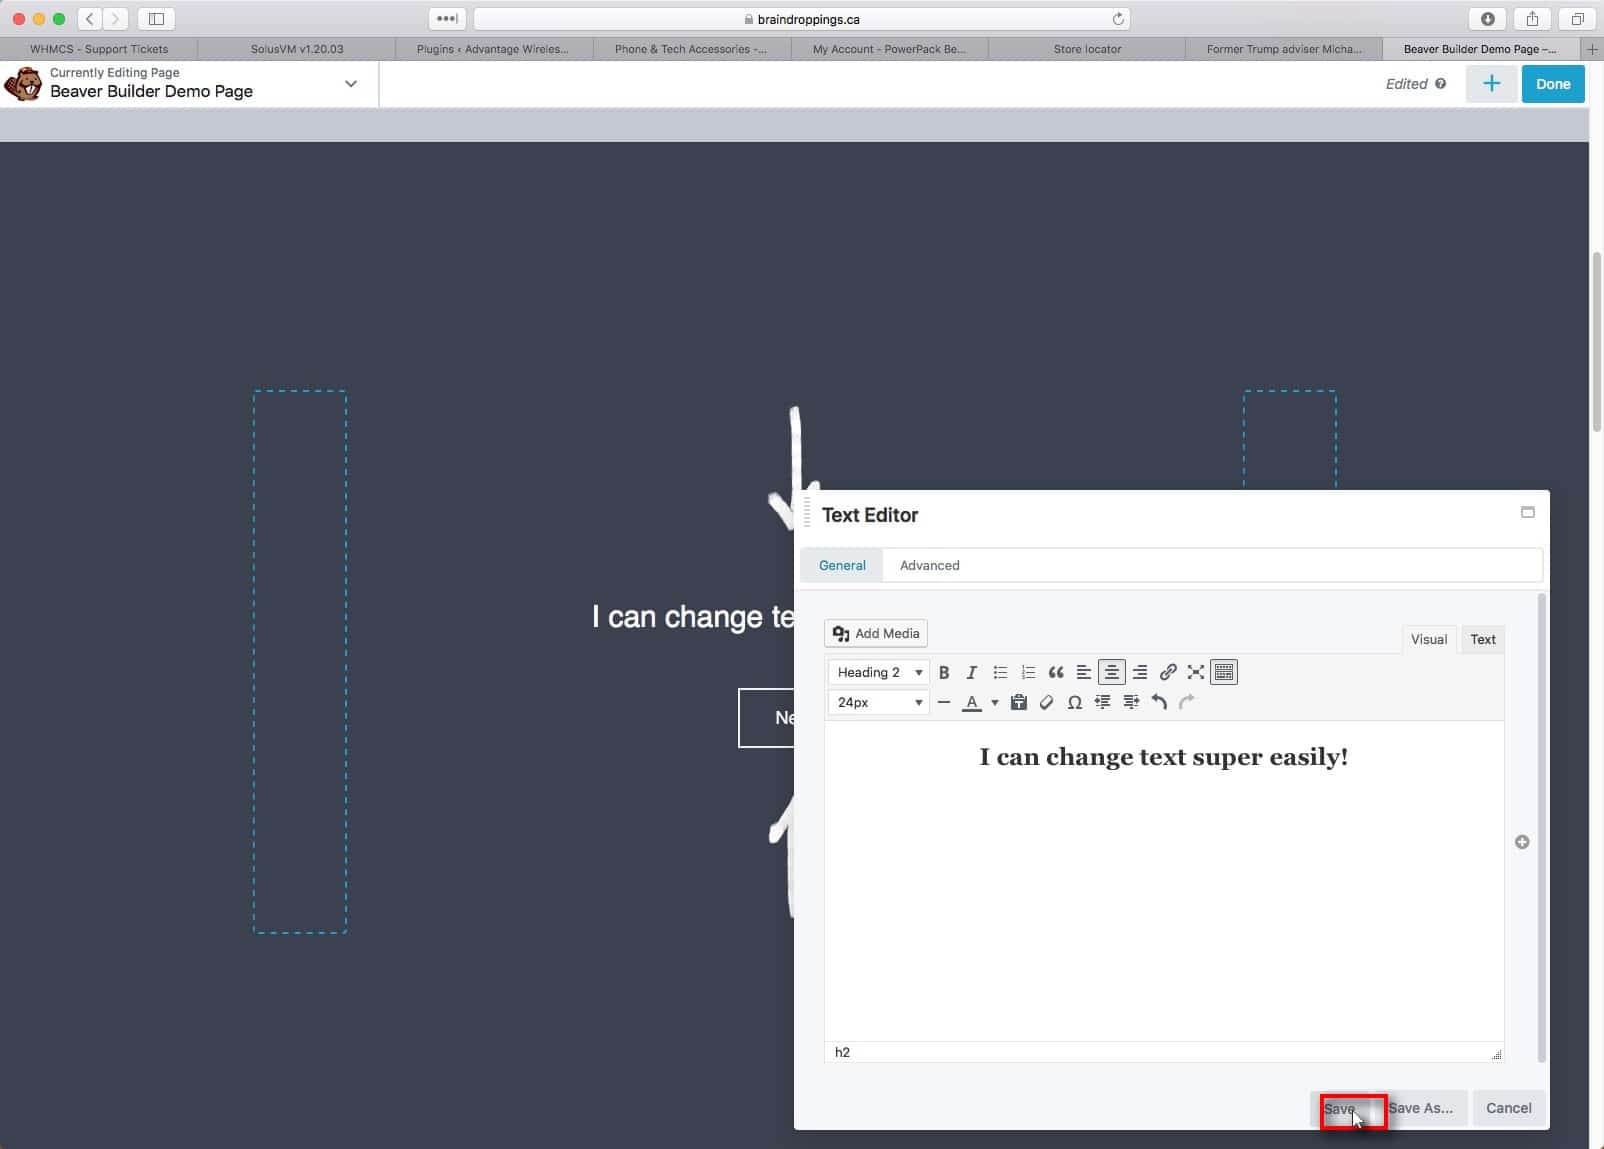
Changing content is as easy as clicking anywhere on the content you wish to change. You will be presented with the module’s settings. In this example, I’ve clicked on a Text Editor element, so the text is immediately available for me to change.
Make the changes you want to the content and click “Save”.
How to Save or Publish a Page in Beaver Builder

To save your work in Beaver Builder, click the blue “Done” button in the upper right corner. This will reveal your options shown in the screenshot.
You can choose “Save Draft” to save the work just in Beaver Builder without publishing it, Discard the work, or Publish it to make it live on the website.
When it was originally published in November 2017, this guide replaced our guide on using WooThemes’ Canvas. We have updated this article extensively since then.
Posted in Web Design, WordPress Plugins
About Websavers
Websavers provides web services like Canadian WordPress Hosting and VPS Hosting to customers all over the globe, from hometown Halifax, CA to Auckland, NZ.
If this article helped you, our web services surely will as well! We might just be the perfect fit for you.
I really didn’t know some of these things before which you have shared with us through your helpful and informative article. also, I like your writing skills. keep sharing awesome stuff.